Free UK Delivery On ALl Orders
new car detailing guide

NEW CAR DETAILING GUIDE

Whether you’re preparing to sell your car at a higher resale value or just wanting to give your vehicle a much-needed facelift, a full car detail can help to extend the life of the car. Follow our complete new car detailing guide on how to perform a full at-home car detail with the right Turtle Wax products

WHAT IS CAR DETAILING?

The average person may assume that car washing and car detailing are the same thing, and while there are some similarities, there are vast differences between the two. Car detailing goes deeper into the nitty gritty, beyond simply just cleaning out your car.

Yes, car detailing does include the task of washing your car and vacuuming the interior, but auto detailers tackle the extended task of reaching every nook and cranny, inside and out, with specialised tools and cleaners. Removing parts may be necessary to truly reach every surface.

After the detailed cleaning has been completed, auto detailers will often use specialised enhancing formulas and products to bring your car back to like-new conditions, with a revived shine and that new car smell that we all love.

what is car detailing

AT-HOME CAR DETAILING

In order to detail your car like the pros, you’ll first need tools and supplies specialised for the job, as well as a few hours to a full day of your time. A newer car that has already been routinely cleaned with general vacuuming and washing will only take about an hour or two to clean. But an older car that has been neglected may need a full day for a first time detailing clean.

WHY DETAIL AT HOME?

The thought of having to set aside a full day of detailing might make you want to scrap the whole idea and call a professional instead, but consider these points:

  • The initial investment of supplies and tools will save you money in the long run, as you won’t need to pay someone’s labour costs every time your car needs detailing. Only replace what you need when you run out.
  • Keeping up with the routine of general cleaning afterward will save you time when you’re ready for your next detail clean.
  • Nothing beats the satisfaction of standing back and appreciating the hard work you just put into your fresh, clean vehicle.
  • This helps to extend the life of your car, by eliminating the substances that degrade your interior and exterior surfaces, and adding protection with the right products.

Always start with the interior first, since repeated in-and-out during the detailing process can leave the exterior filthy. Focus on the inside of your car first, and after it’s pristine, close the doors and windows, and turn your attention toward the exterior.

detailing car at home

INTERIOR DETAILING PRODUCTS AND STEPS

These next steps will highlight the useful tools needed (bold), the cleaning products recommended (underlined), and tips from the pros (italicised), to get professional results right at home.

  • The best starting point is by removing any rubbish. Don a pair of latex or nitrile gloves, grab a rubbish bag, and begin picking up anything that’s too big for the vacuum to suck up. Look inside every cubby, console, cup holders, and door pockets. Find a temporary spot to hold any loose coins you find.
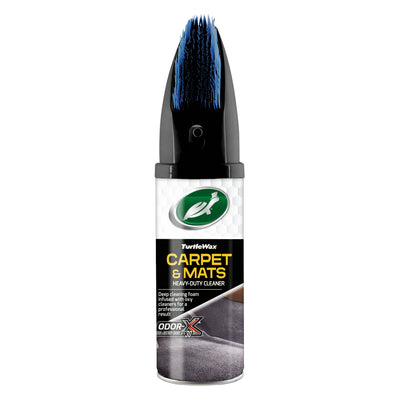
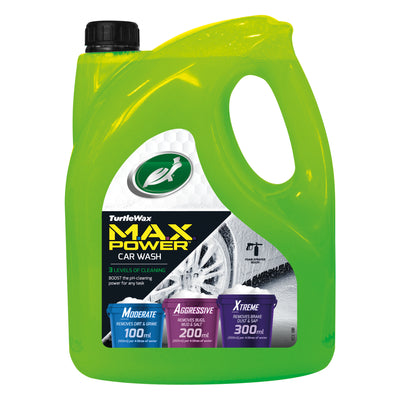
  • Take out the floor mats and give them a good shake to remove any loose dirt and gravel. For rubber floor mats, use a stiff brush and car wash soap, like our MAX Power Car Wash. For carpeted floor mats, a stiff brush or steam cleaner paired with an upholstery cleaner, like our POWER OUT! Carpet & Mats Cleaner will work best. Hang the mats to let them air dry after they have been cleaned.

Pro Tip: To speed up the drying process, use a wet-dry vacuum to suck up excess water.

interior detailing products & steps

REMOVE UNPLEASANT ODOURS

  • A dry microfibre duster should be used for dusting, starting from the top and working your way down. Move it across the dash, the instrument gauges, centre console, door panels and handles. For the cracks and crevices, use an air compressor or electronics duster.

Pro Tip: For dust in small spaces and cracks, a little trick that comes in handy is using a long-bristled artist’s paintbrush or makeup brush, with a light spritz of furniture polish on the bristles.

  • Take note of how the inside of your car smells. Food smells and musty odours can be eradicated with a deodorising fogger, like our ODOR-X Whole Car Blast Kinetic. Remove the cabin filter, which is usually found behind the glove compartment, and run the highest setting of your fan’s recycled air mode with the AC off. Next, roll up all of the windows, press the can’s actuator to dispense the product, exit the vehicle, and keep the doors shut for 15 to 20 minutes. The deodoriser will circulate throughout the inside of your car, leaving behind a pleasant scent. Afterward, install a new cabin filter, Our Power Out! Odor-X spray can be used in the boot and air vents.
remove unpleasant odours

REFRESH YOUR UPHOLSTERY

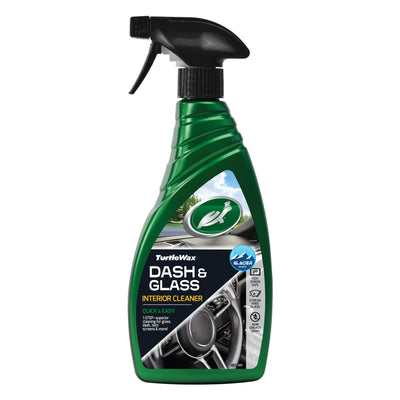
  • The next step is cleaning the hard surfaces. An all-purpose cleaner, like our Dash & Glass Interior Cleaner, is perfect for plastic, vinyl, and even tech screens that are mostly clean already, but could use a quick wipe-down. Just spray the surfaces and use a clean microfibre cloth to apply the product, and a second one to wipe and buff the areas clean, leaving behind the right amount of shine. For stains and grime that are a bit tougher to clean, try a diluted organic or citrus cleaner.

Pro Tip: Instead of spraying the cleanser directly onto the surface, spray it onto a microfibre cloth, to prevent overspray and dripping.

  • On to the soft surfaces next. Use a foaming upholstery cleaner, like our Power Out! Upholstery formula, which can be sprayed directly onto cloth, door panels, and headliners. Allow it to penetrate any stained and soiled spots for a few minutes before using a stiff brush to loosen up the dirt.
  • Because it’s easy for seats to soak in extra dirt and smells, they’ll need a little more attention. The Power Out! Upholstery cleaner can be left to penetrate stains for five to ten minutes before using the stiff brush to clean the seat. The Odor-X technology in the formula will eliminate any odours and continue to deodorise for up to 30 days. For more stubborn stains, you can allow the cleaner to soak into the messes for an even longer amount of time, or you may need to go the steam cleaner route.
refresh your upholstery

RENEW YOUR LEATHER SEATS

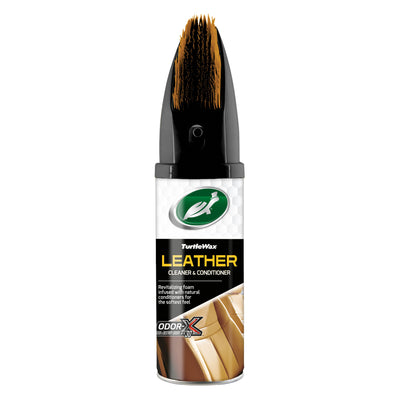
If your car has a leather interior, special care will need to be taken. Because of its sensitive nature, the wrong products used can cause it to dry out, fade, and crack. Use a conditioning formula specialised for leather, like our POWER OUT! Leather Cleaner & Conditioner, which does not use harsh chemicals and will leave you leather seats feeling soft and supple. Use the integrated soft brush to scrub out any stains. For stains that are a bit tougher to loosen up, try diluted citrus or organic cleanser first.

Pro Tip: Working from top to bottom is best, because loosened dust and dirt will fall.

Use a wet-dry vacuum, ideally with automotive accessories, to suck up dirt and dust off the carpets. Move the front seats as far back as they’ll go, to get all the debris that tends to collect underneath. If you’re able to, with a few hand tools, remove the seats completely, along with the centre console and other inside trim pieces to ensure every bit of carpet doesn’t get overlooked.

Pro Tip: Before you vacuum, ruffle the carpet with a stiff brush to knock the dirt in the fibres loose.

renew your leather seats

SAVE THE GLASS FOR LAST

  • Now it’s time for the carpet shampoo. With our POWER OUT! Carpet & Mats Cleaner, focus on one section at a time, including inside the boot, using the built-in brush or a stiff brush to work the foam deep into the carpet fibres. Use a wet-dry vacuum or steam cleaner to suck up the foam and dirt.
  • We recommend saving the glass for last, because during the process of cleaning the rest of the interior, the chemicals and products used tend to get splashed on your windows. Use a non-ammonia glass cleaner, spray it on a microfibre cloth, and clean all exposed interior glass, ensuring not forget the rear view mirror, dome lights, or sunroof, if you have one.


Pro Tip: For cars with upper window frames, roll down the windows just a bit, clean the top edge of the glass, then roll the windows up and clean the rest of the glass.

save your glass for last

EXTERIOR DETAILING SUPPLIES AND STEPS

The task of exterior detailing is a bit more extensive than simple washing and rinsing. Move your car out of direct sunlight, ensure all the windows are rolled up completely, then pop the bonnet and fuel door.

START FROM THE BOTTOM

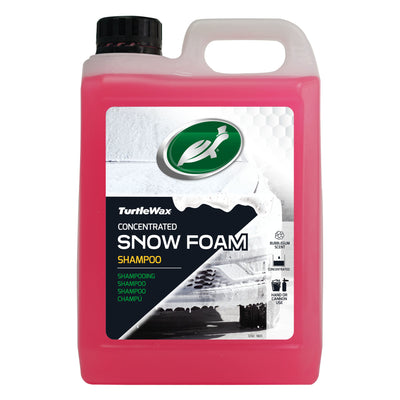
  • Give your car a good, thorough rinse with a garden hose or pressure washer, working from the bottom to the top, to loosen up dirt and bugs and allow them to run off. Apply a snow foam pre-wash after the car is rinsed.
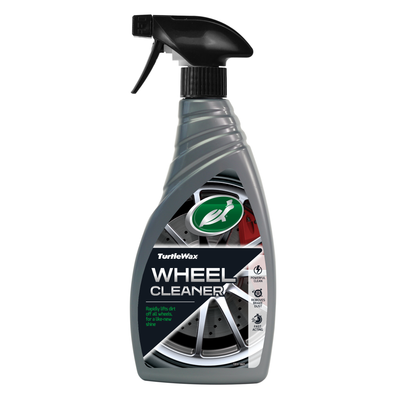
  • Next, clean the tyres with a tyre and wheel brush and our Wheel Cleaner, which is formulated to dissolve brake dust, tar, and road grime. Make sure to work the foam into all crevices.


Pro Tip: Cleaning the tyres last means you may accidentally splash dirt and other contaminants onto the body of your clean car.

start from top to bottom

ENGINE BAY CARE

  • A clean engine is a happy engine. It’ll run cooler, last longer, and you and your mechanic will find it much easier to work on. If your engine has a distributor, cover it with a plastic bag before you begin. With a garden hose or pressure washer, rinse the underside of the bonnet and engine bay. Soak everything with an undiluted organic or citrus degreaser. Clean the inside of the fuel door, too. Wait about five to ten minutes, then rinse well with water.


Pro Tip: The degreaser will work better if the engine is warmed up.

  • Now we’re ready to wash the car, using a microfibre wash mitt and the two-bucket method — one bucket filled with our MAX Power Car Wash and water, and the other filled with clear water for rinsing. You may also need a short stool, step ladder, or long-handled soft brush to help you reach the top of your car. With the two-bucket method, always rinse your wash mitt in the clear water first before sticking it back in the soapy water, to keep from contaminating the wash formula. Work your way down by starting with the roof, then onto the windows, the bonnet, boot, and all side panels. Use a soft brush for reaching deeper into the grille.

Pro Tip: Use warm water, no hotter than 60°C, to help the soap mix better in the water. Be generous with the amount of soap you use on your car — don’t let it dry!

engine bay care

PROTECT YOUR PAINT

  • Starting at the top, use a garden hose or pressure washer to rinse your car. Don’t let it air dry. Instead, use a chamois or microfibre cloth to dry your vehicle by hand, to avoid water spots being left behind. Wring out the cloths when they get too wet or switch to dry cloths. Open the doors and dry off the weather seals. Apply a sleek layer of our Wet’N Black Tyre Dressing Aero to the weather seals to prevent sticking and give it a glossy look.
  • Contaminants are likely still sticking to your paint and glass in the form of grease, tiny bug splatters, brake dust, and water spots. Now that your car is clean and dry, it’s time to use a detailing clay and clay lubricant. The leftover soapy water will work well for the lubricant. Work the clay over your car, working in one small section at a time. Knead the clay as your work, and use your fingers to feel where the paint may not feel sleek to the touch, and focus on those spots with the clay bar.


Pro Tip: Clay bars work well on glass and chrome surfaces, but are NOT safe to use on rubber, plastic, or polycarbonate.

protect your paint

ADD LAYERS OF PROTECTION

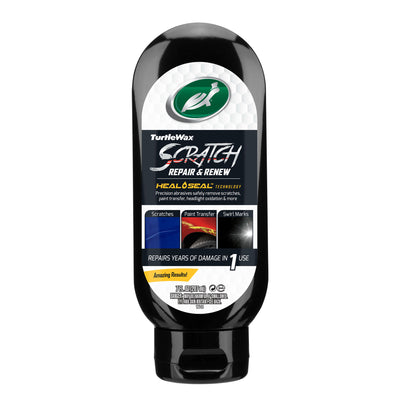
  • What if your vehicle has scratches or chipped paint? If they’re minor enough, they can be restored during the exterior detailing process. Our Scratch Repair and Renew can be applied to a foam applicator, microfibre cloth, or dual-action (DA) orbital polisher, to repair the paint surface.
  • For microscopic clear coat imperfections, a polishing compound can be beneficial. You can work by hand using a foam pad, or if you’re comfortable and confident, with a powered dual-action (DA) orbital polisher. Work one small section at a time, buffing until there is an even shine, adding more compound as needed. Check how different sections of the paint surface reflect the light, to ensure you’ve got a flawless finish.

Pro Tip: Use masking tape to protect your plastic and rubber trim, emblems, and headlights from the compound.

add layer of protection

FINISH UP WITH A SHINE AND POLISH

  • If you tyres are dry, give them one final spray with our Wet’N Black Tyre Dressing Aero, for that sleek black shine. Or, you can use a cloth to wipe them down for a matte finish. This formula helps to keep your tyres stay cleaner, protects them from sun damage, and slows down dry rot.
  • As the final step, it’s time to clean the exterior glass. Use non-ammonia glass cleaner and a couple microfibre cloths — one kept moist with glass cleaner and the other for buffing out streaks. Begin at the top with the sunroof, work your way down to the windscreen and side windows, wing mirrors, and rear window. Lastly, clean the headlamps, fog lights, and brake lights.


You’re done! You can now stand back and admire your freshly detailed car, show it off to your friends or family members, and take pride in the hard work you just accomplished. While your first time detailing at home may have been exhausting, the more you tackle the task on your own, the easier it’ll become.

shine & polish to finish

FREQUENTLY ASKED QUESTIONS

1. Why should I detail my car?

Detailing a car is all about long-lasting protection, rather than just basic cleaning.

2. How long does it take to detail my car?

If it’s your first time, it could take anywhere from two to eight hours, but subsequent details should take two hours or less.

3. How often should I detail my car?

Ideally, a full auto detail is needed only once a year. However, wax and paint sealants usually last only a few months, so touch-ups will be needed in between full detailing.

4. What supplies do you need to detail a car?

It’s best to use materials that are designed and formulated specifically for cars. Home remedies may negatively affect automotive finishes.

5. Is hot water bad for car paint?

Try to keep the water between 37° C and 60° C, the ideal temperature that’s warm enough for helping car wash soap cut through water, but not too hot that it damages your car paint. The “Goldilocks” temperature, if you will.

6. Why should I wax my car?

Car wax improves shine and adds a protective coating against sticky substances like bugs and road grime. It’ll need to be reapplied every few months.

7. Why should I polish my car paint?

Compounds use abrasives to refine the surface of the clear coat, so the underlying paint coat shines through beautifully. Compounding can be done by hand or with a dual-action (DA) orbital polisher.

8. Can polishing remove scratches from my car?

Different grades of abrasives are used for different levels of severity. Swirls and light scuff are typically just on the clear coat layer, and can easily be refined with a polishing compound. However, deeper scratches that reach into the paint layer will need wet-sanding, touch-up paint, and a fresh layer of clear coat to fully restore the original finish.

Related Articles

WANT MORE TURTLE WAX?

Subscribe for your newsletter and the rewards will be in your inbox before you even get there

Latest

News, events and insights from Turtle Wax® worldwide

Offers

Exclusive offers and discounts on Turtle Wax® products

Rewards

Regular treats and surprises for all subscribers

Thanks! You should receive a confirmation email shortly.